Yoga Corner: Sequence
A Step-By-Step Halasana and Sarvangasana Sequence
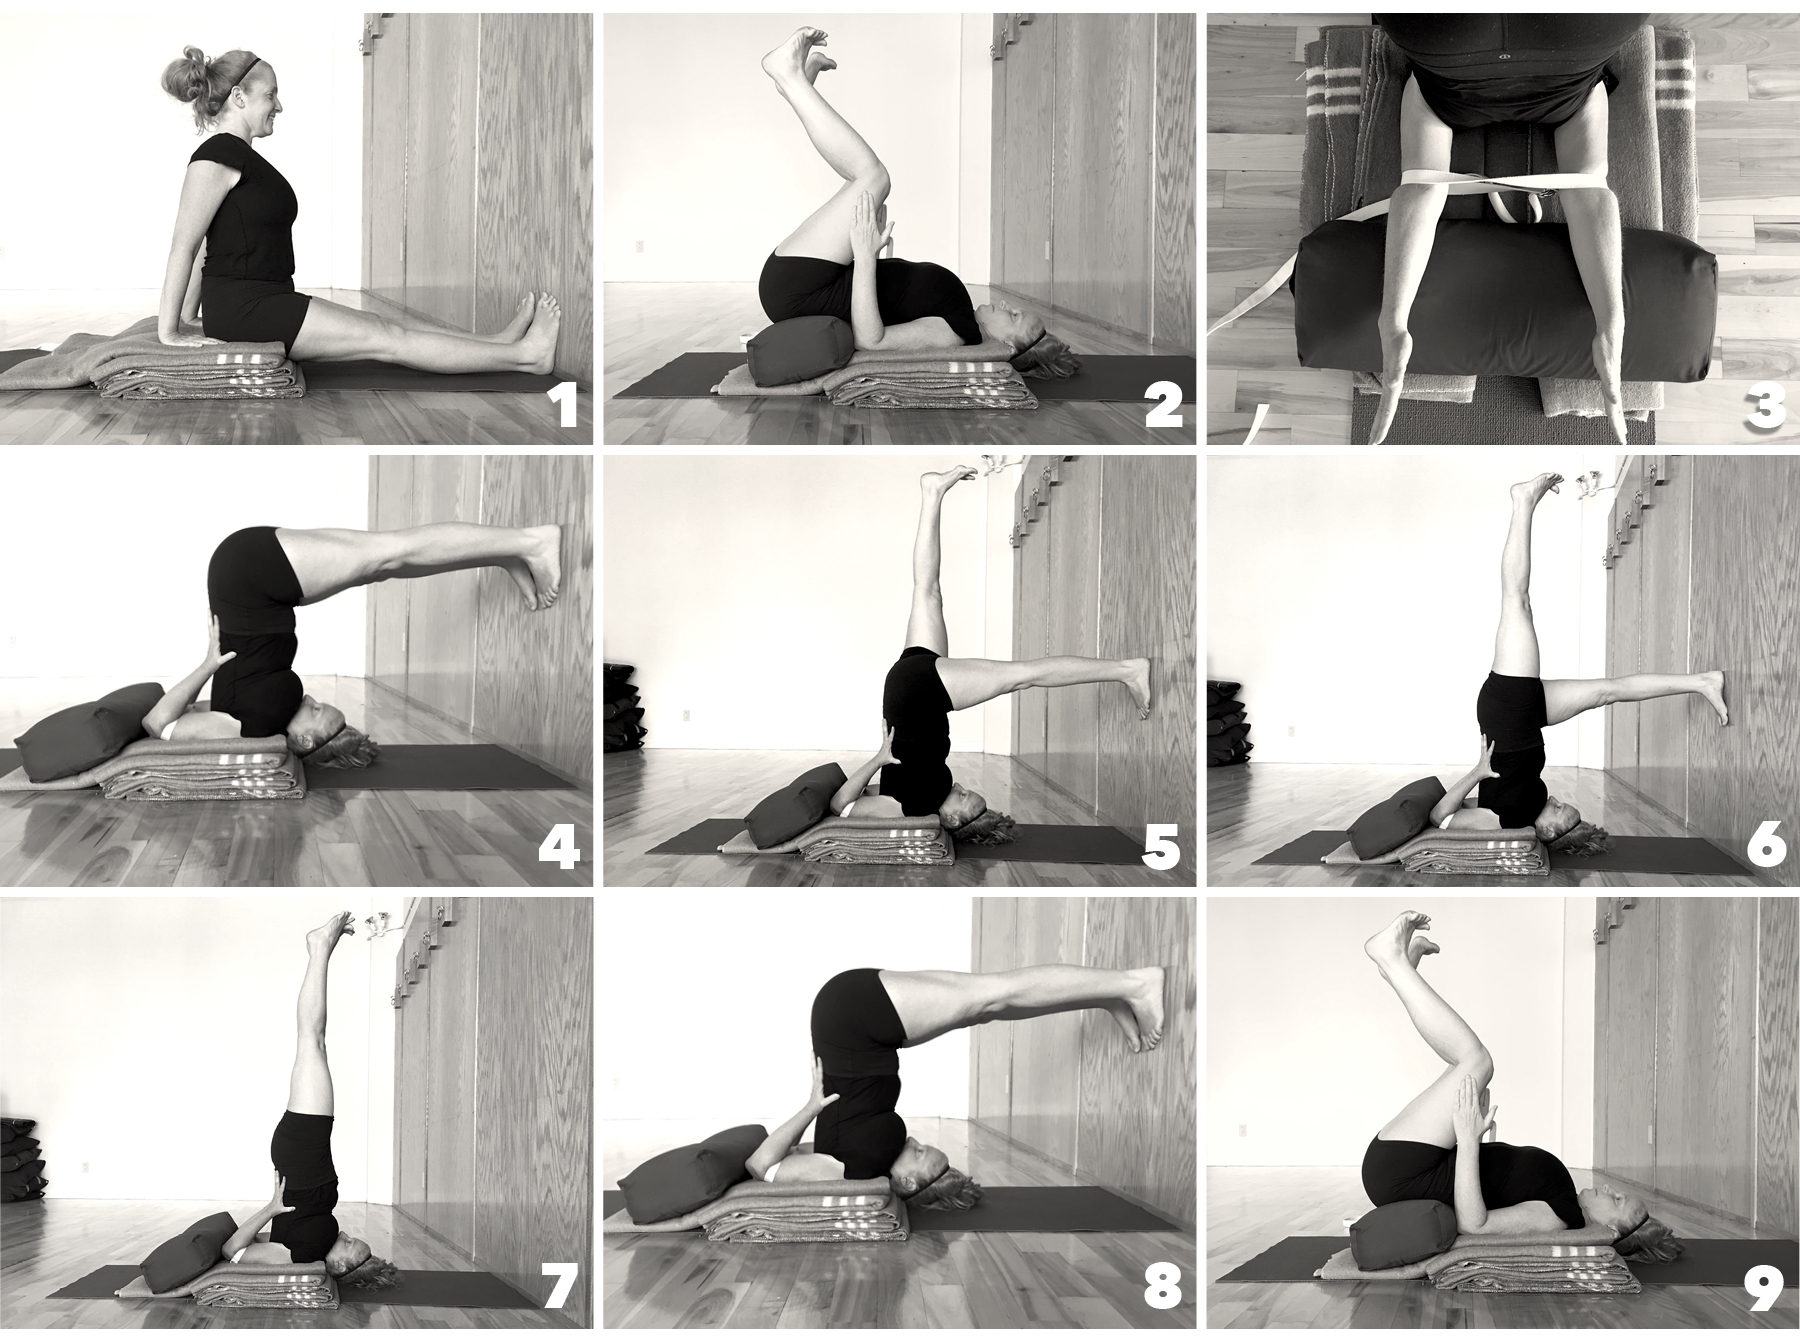
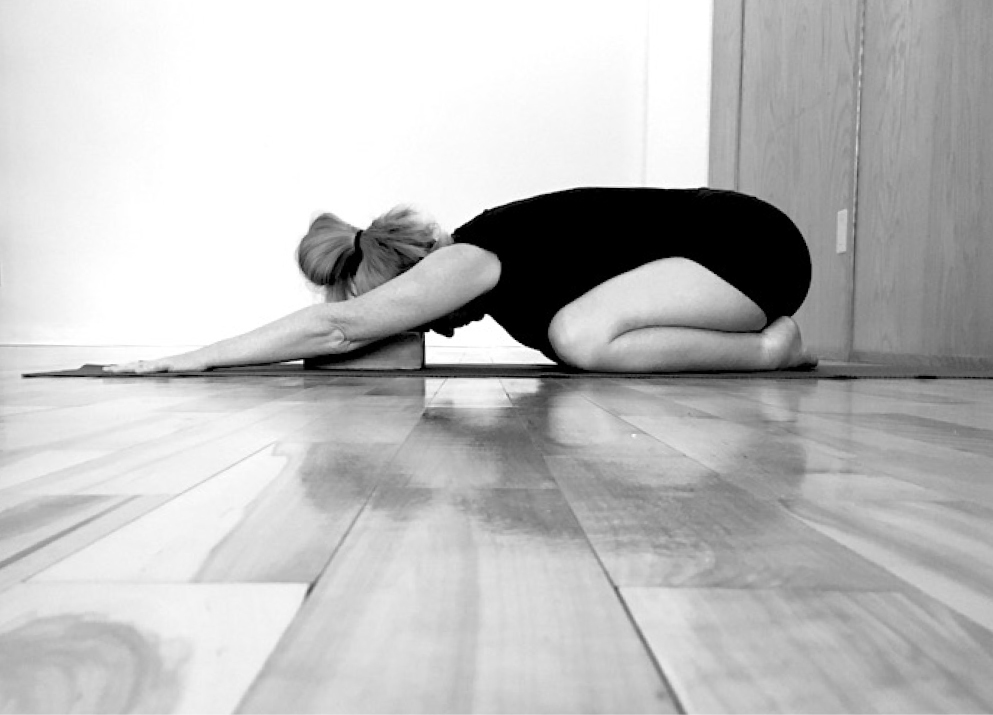
Photo 1: Set-Up: Place at least 4 properly folded blankets on top of each other with the rounded fold towards the wall. Be sure that the surface of the blankets is large enough to fit elbows, upper arms and top of shoulders.
To measure the correct placement of Halasana, sit in Dandasana with the top, upper femurs on the edge of the blankets (sit bones a bit back from there) with straight legs and feet pressed into the wall. Mark where the sit bones are on the blanket, as that is where the top shoulders will go in Halasana.
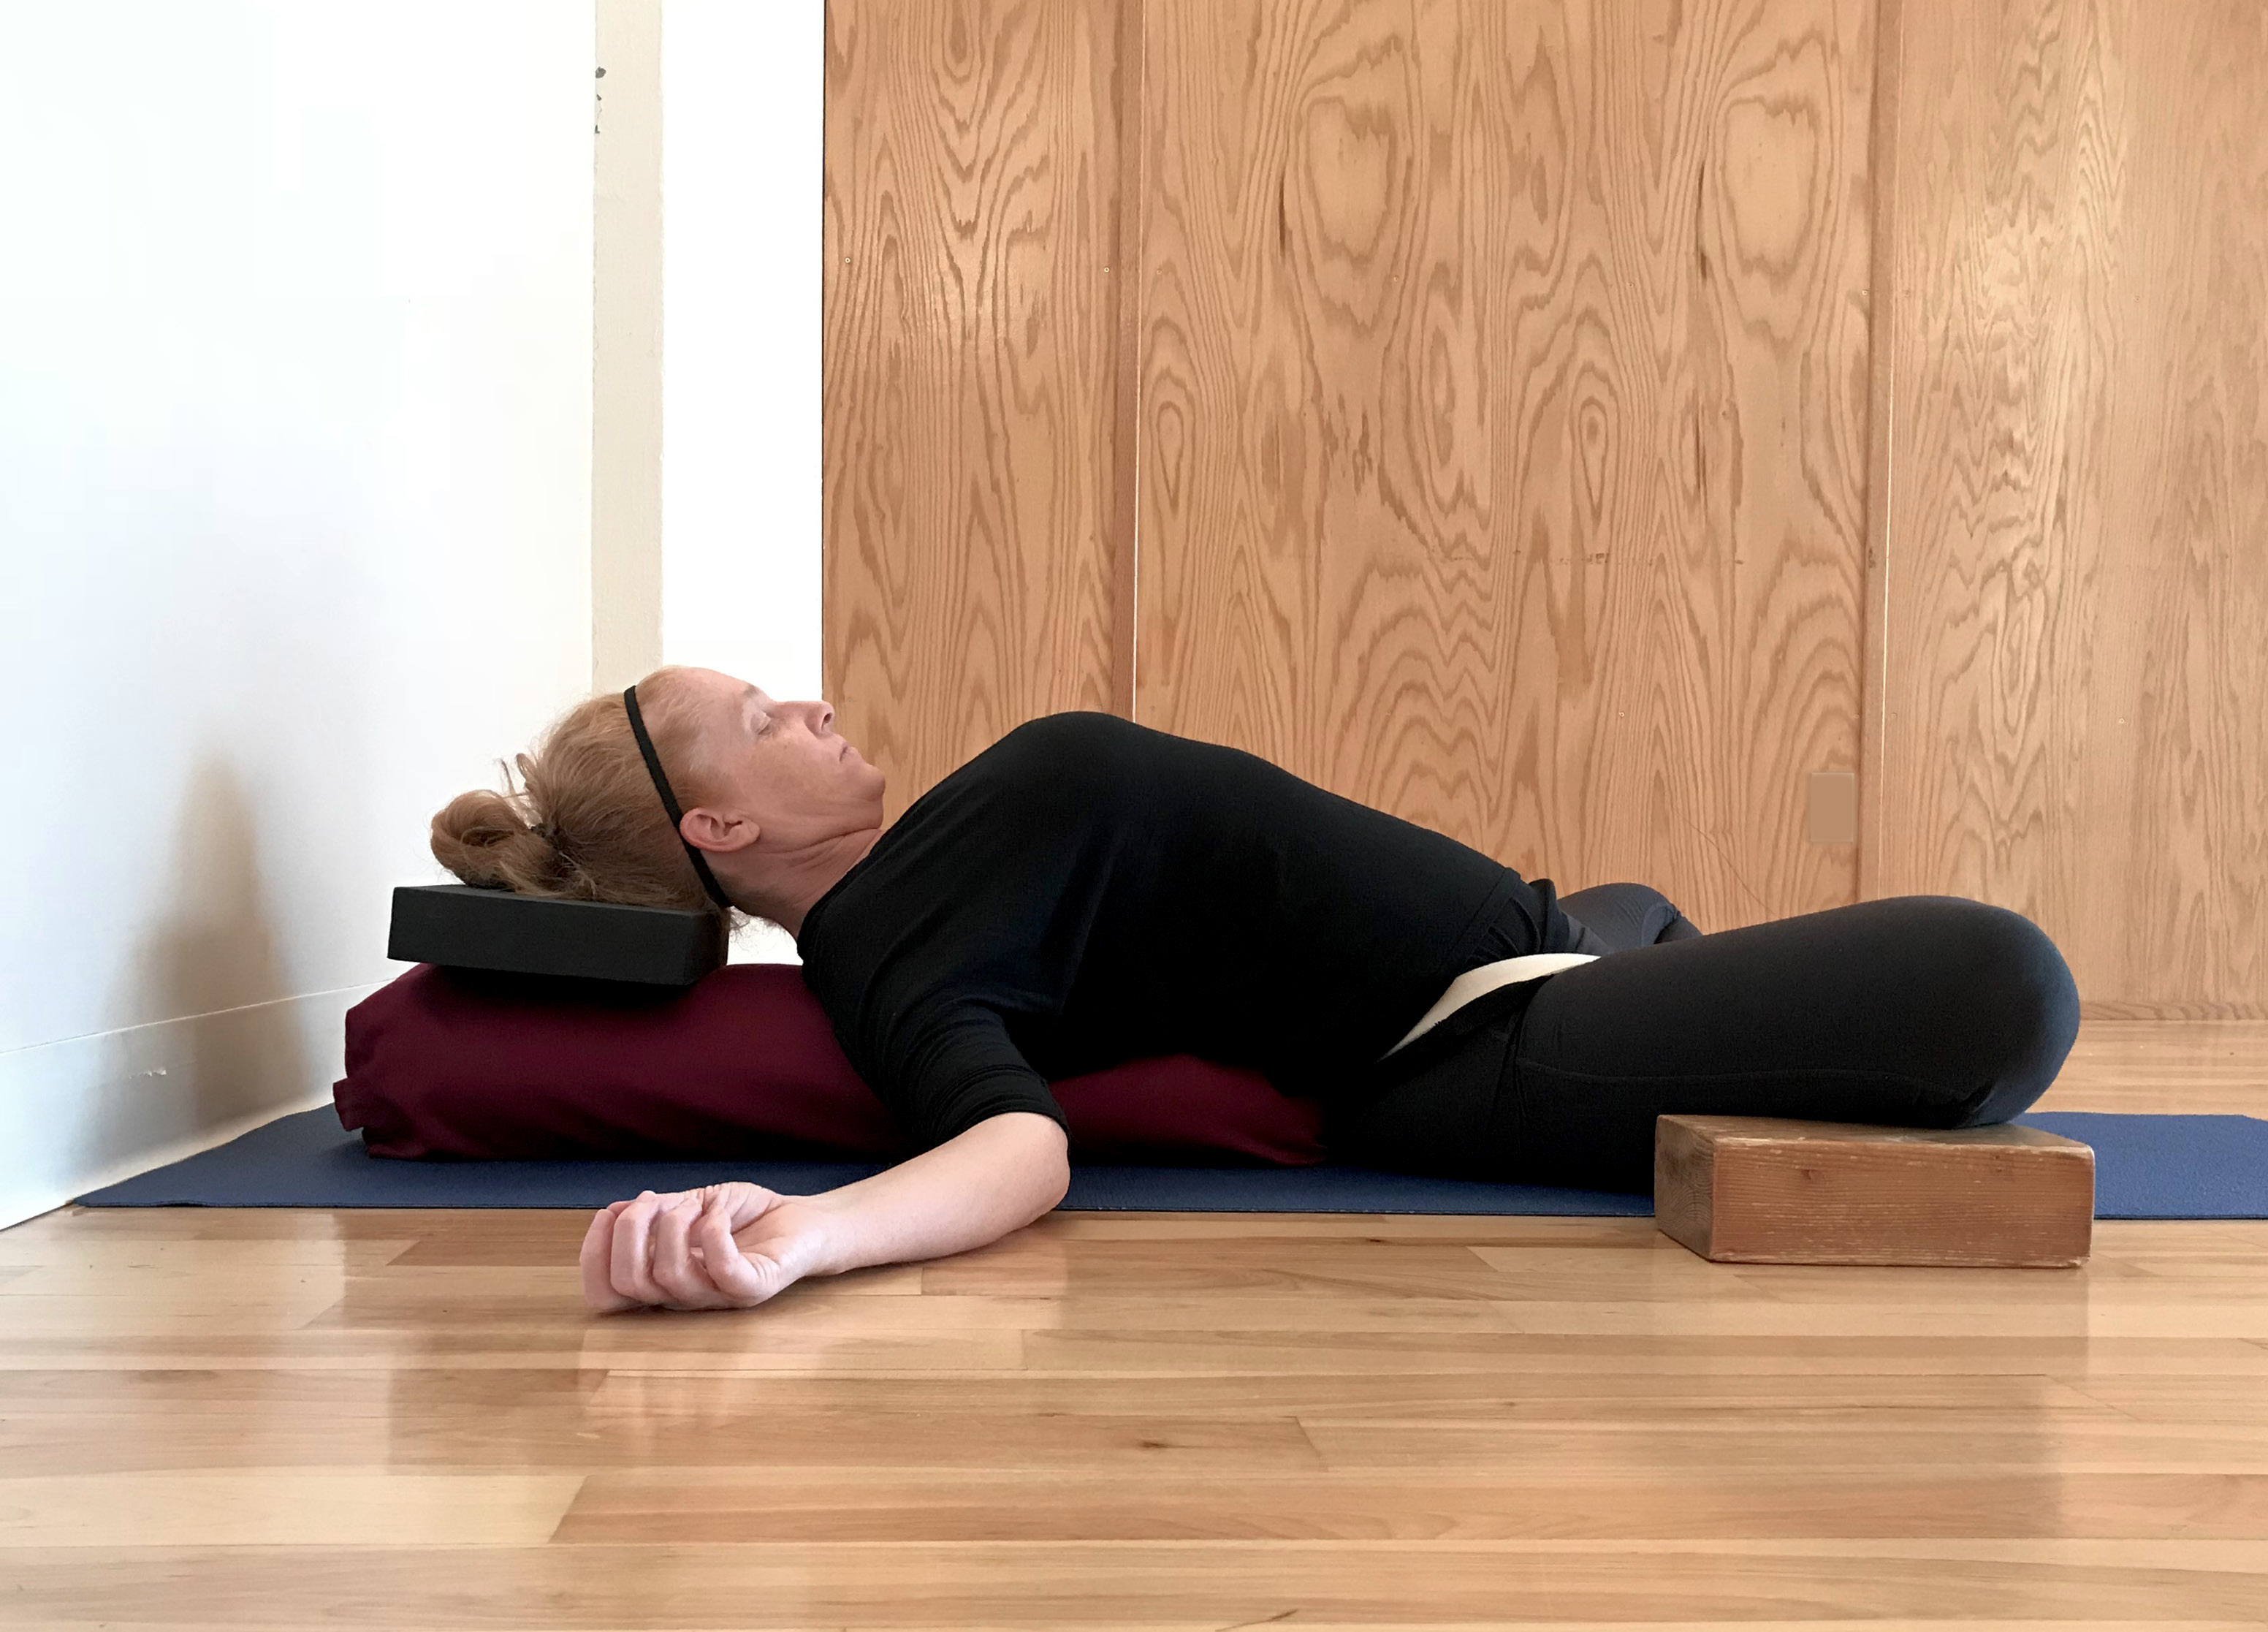
Photo 2: With a bolster under the pelvis, lie down with the shoulders placed where the sit bones were in Dandasana. The bolster is to help students who have trouble going up into Halasana, and is a great support for everyone when coming down from this pose.
Photo 3: Place a belt (to hold the arms shoulder-width apart) just above the elbow joint. Loop the belt around one elbow in preparation (Photo 2). When lifting the pelvis towards Halasana, put the other elbow into the belt.
Photo 4: With properly placed blankets, the top of the shoulders should be a few inches from the edge of the blankets, C-7 just on the edge/off of the blankets and the back of the head on the floor. Place hands on the back to support the kidneys. (Fingers pointing up, not touching the spine.) If the impulse is to lift the spine with the hands, try increasing the number of blankets under the shoulders. Lengthen the spine while lifting the sit bones and top thigh bones to the ceiling. The legs should be completely straight with all 4 points of your feet pushing into the wall. (Note: if there is trouble lengthening the spine and getting the legs straight at the same time, walk the feet up the wall to find the length required to keep the alignment of the spine and straight legs.)
Photo 5: From Halasana, keep the left foot-leg stable and lift the right leg up, working towards Sarvangasana. The lifted leg is extending fully out of the pelvis as well as internally rotating. Work towards keeping the ankle, knee, hip and top shoulder of the right side in line as well as the hip and top shoulder of the left side in line.
Photo 6: Lower the right leg back to Halasana, then lift the left leg, using the same actions and alignment as in Photo 5.
Photo 7: When ready, bring both legs up into Sarvangasana. Be sure legs are fully extended and internally rotated; ankles, knees, hips and top shoulders in line.
Photo 8: Lower legs back to Halasana.
Photo 9: Remove the belt and gently roll down to the floor.
Practice notes:
Start in Halasana for 15 breaths, then right leg up 15 breaths, then left leg up 15 breaths, then both legs up in Sarvangasana 15 breaths, then back to Halasana for 15 breaths. Once this is managed without strain, work up to 30 breaths in each position. When these postures can be held for 30 breaths you will be ready to hold Sarvangasana and Halasana for more than 5 minutes at a time, which is ideal for gaining the many benefits of these poses.
Prepared and demonstrated by Donna Read
Donna would like to express gratitude to her teacher, Hart Lazer and to his teachers for their inspiration and wisdom.


